A cold shower may be the most obvious sign of water heater trouble, but it is rarely the only one. Fluctuating temperatures, unusual noises, discolored water, leaks, or a hot water supply that runs out too quickly can all indicate that something within the system needs attention.
This repair and troubleshooting guide for water heaters helps homeowners understand what common symptoms may mean and which problems have straightforward solutions.
Issues can range from incorrect thermostat settings and sediment buildup to faulty heating elements, burner problems, or aging components that require professional repair.
Knowing what to check first can save time and help prevent a minor issue from becoming more disruptive. Just as importantly, understanding when to stop troubleshooting and call a qualified professional can keep repairs safe and protect your water heater from further damage.
When Traditional Repair Can Fix Your Water Heater Problems
What Are Common Problems With Traditional Water Heaters?
Traditional tank-style water heaters can develop several recurring problems as components wear, sediment accumulates, or corrosion begins inside the tank. The most common warning signs include leaking water, little or no hot water, inconsistent temperatures, unusual noises, and ignition problems on gas models.
Recognizing the symptom is only the first step. The cause can vary depending on whether the unit is gas or electric, how old it is, and whether the problem comes from the tank itself, the controls, or the surrounding plumbing.
For homeowners weighing traditional repair options, the key is knowing which issues may be minor and which can signal a failing tank or safety concern.
What Does Water Around the Tank Usually Mean?
Water near a water heater should never be ignored, but it does not automatically mean the tank has failed.
Moisture can come from loose plumbing connections, valves, condensation, or the temperature and pressure relief system. A leak from the tank body or a corroded seam is more serious because the storage tank itself is generally not repairable once it begins to fail.
Start by identifying where the water appears to originate without removing panels or disturbing gas or electrical components. Look around the inlet and outlet connections, drain valve, and visible fittings. If water is actively spreading, shut off the water supply to the unit if it can be done safely and arrange for service.
Visible corrosion, leaking seams, and rust-colored hot water can all point to deterioration inside an aging tank. ENERGY STAR lists leaking, corrosion, rusty water, reduced hot-water capacity, and rumbling as common warning signs associated with water-heater failure.
Why Is the Water Heater Not Producing Enough Hot Water?
No hot water and insufficient hot water are different problems. On an electric unit, a failed heating element, thermostat issue, tripped breaker, or high-limit control can interrupt heating. Gas units may experience burner, gas-control, ignition, or pilot problems depending on the model.
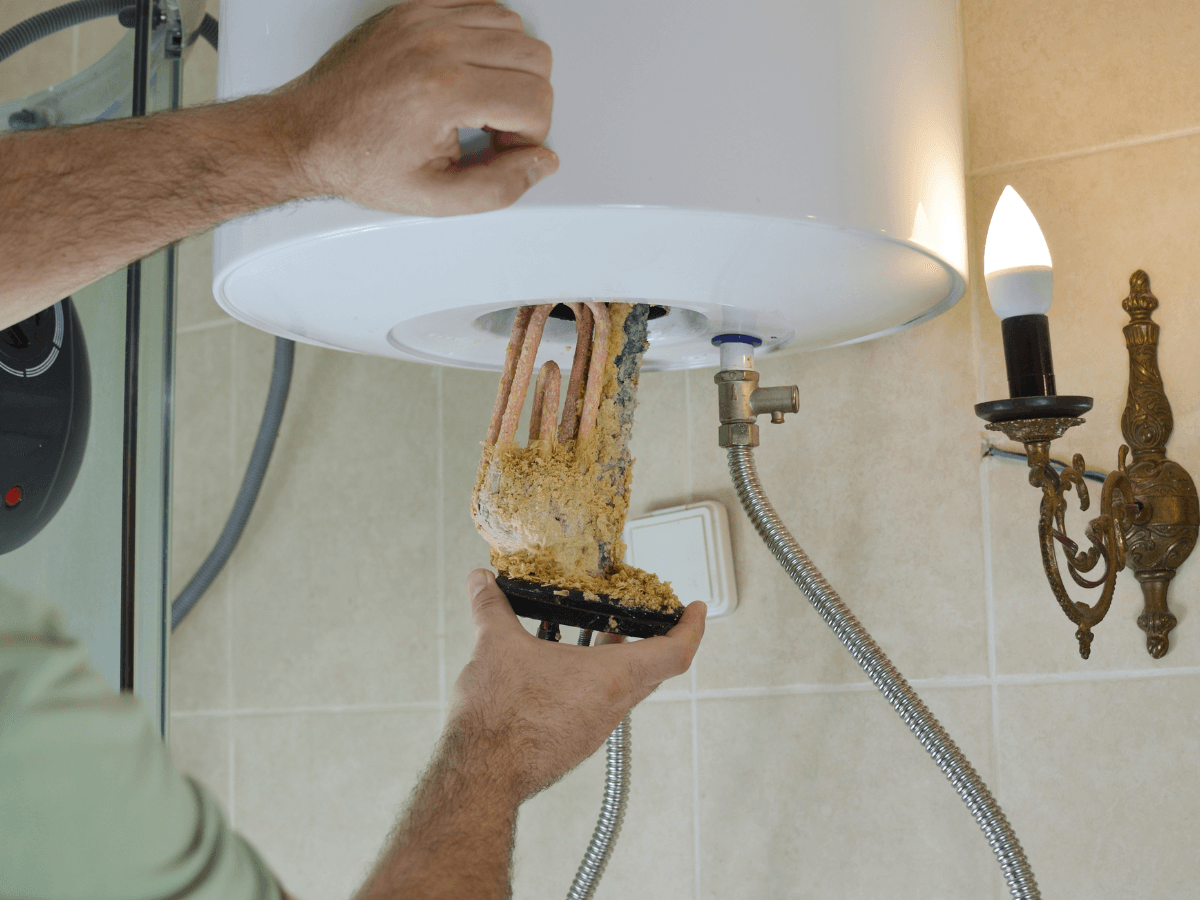
A gradual reduction in hot-water capacity can also indicate sediment buildup. Minerals settle at the bottom of a storage tank over time, reducing usable space and interfering with heat transfer.
That may cause the system to run longer while delivering less hot water than it once did. Rheem identifies sediment, faulty thermostats, burned-out heating elements, and damaged dip tubes among possible causes of reduced hot-water output.
If the heater has always struggled during periods of heavy demand, the problem may also be capacity rather than a failed component.
What Do Popping or Rumbling Noises Mean?
Traditional water heaters should operate relatively quietly. Popping, crackling, or rumbling sounds often develop when sediment collects at the bottom of the tank.
As water heats beneath or around that mineral layer, bubbles can form and move through the deposits, creating noticeable noise. Manufacturer troubleshooting information also associates sizzling or rumbling sounds with sediment or calcium accumulation.
Noise alone does not prove that the tank needs replacement, but it should not be dismissed if it appears alongside declining performance, rusty water, or leaking.
Regular flushing may help control sediment buildup when performed according to the manufacturer’s maintenance instructions. Rheem currently recommends annual flushing for many households, with more frequent maintenance potentially needed in hard-water conditions.
Why Does a Gas Water Heater Pilot Light Keep Going Out?
Older and some conventional gas water heaters use a standing pilot or pilot assembly to ignite the burner. If the pilot will not light or repeatedly goes out, possible causes include an ignition problem, restricted air intake, a dirty pilot assembly, a thermocouple or thermopile fault, gas-control problems, or issues with the gas supply.
A.O. Smith troubleshooting materials list dirty pilot components and thermocouple malfunction among possible causes on applicable models. Newer models may use different ignition and safety systems, so the label and owner’s manual for the specific water heater should always take priority over generic advice.
Homeowners can usually confirm basic items such as whether the gas supply valve is in the correct position and follow the manufacturer’s published lighting procedure.
Beyond that, repeated pilot failure should be professionally diagnosed rather than bypassing safety controls or attempting gas-component repairs without appropriate training.
If you smell gas, do not attempt to relight the appliance. Leave the area and follow the gas utility or emergency-service instructions for your location.
When Does a Traditional Repair Make Sense?
A repair can be reasonable when the tank remains sound and the problem involves a replaceable component such as a thermostat, heating element, valve, igniter, or pilot assembly. The unit’s age, condition, repair history, and the cost of the failed component all affect that decision.
Repair becomes less attractive when the storage tank itself is leaking, corrosion is extensive, or several major components are beginning to fail. In those cases, replacing the unit may be more practical than continuing to address one problem at a time.
Ace Tech includes water heating and filtration among its residential services, but the decision between repair and replacement should still begin with the condition of the equipment rather than the service being sold.
An accurate diagnosis can distinguish a manageable component failure from a tank that is approaching the end of its usable life.
Traditional repair is most effective when it addresses a specific, repairable fault. Leaks from the tank body, recurring ignition failures, major corrosion, and declining capacity deserve a broader assessment before additional money is invested in an aging system.
How Can You Diagnose and Fix Water Heater Leaks?
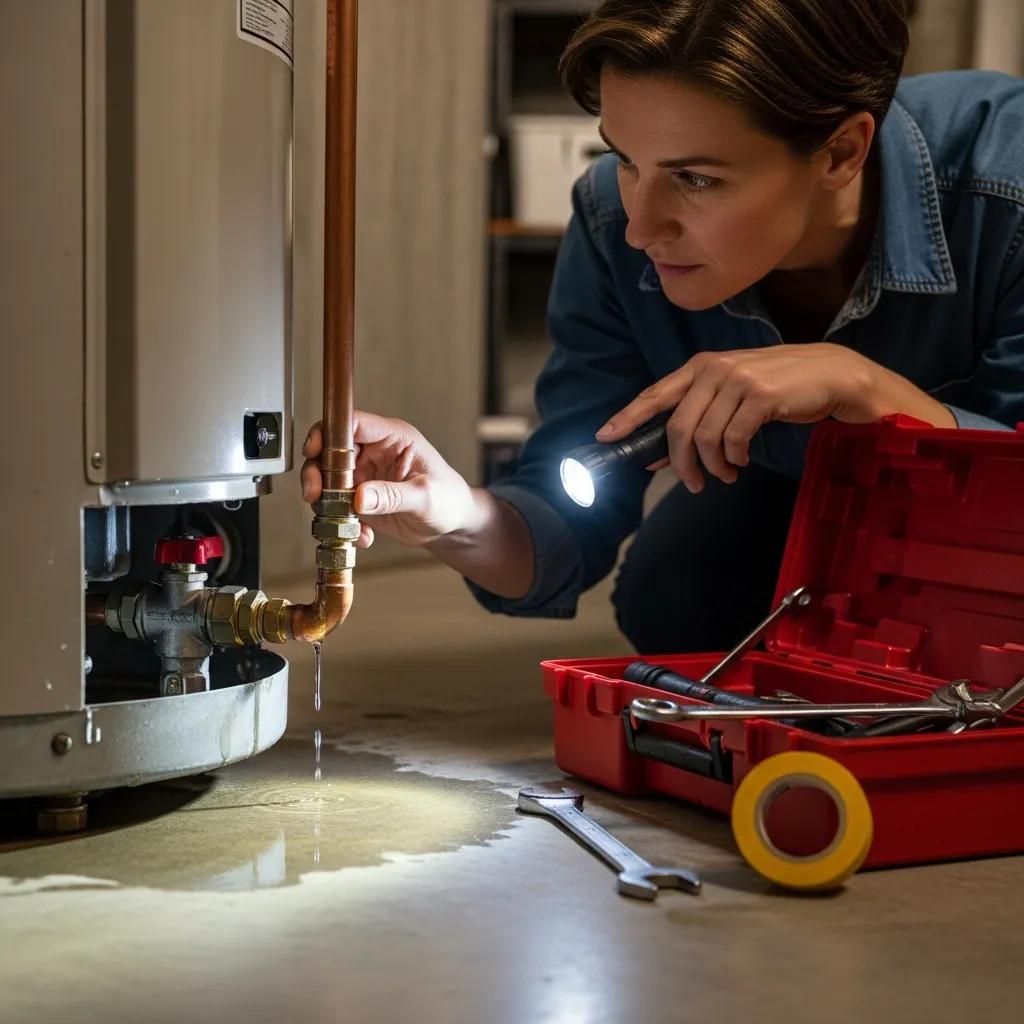
A leaking traditional water heater does not always mean the entire unit needs to be replaced. Water can escape from plumbing connections, valves, the drain assembly, or the tank itself, and each source calls for a different response.
Finding where the moisture originates is therefore more useful than immediately assuming the worst.
The first priority is safety. Water heaters combine hot water under pressure with either electricity or gas, so homeowners should limit DIY troubleshooting to visual inspection and basic shutoff procedures they can perform safely.
Traditional repair may be appropriate for a replaceable valve or connection, but a leaking storage tank generally requires a different approach.
Start by Confirming Where the Water Is Coming From
Before assuming the heater is leaking, dry the surrounding area and inspect the unit carefully. Condensation, nearby plumbing, or water running along a pipe can sometimes create a puddle that appears to originate from the tank.
Look around visible supply connections, the top of the unit, the drain valve near the bottom, and the temperature and pressure relief system. A flashlight can help trace moisture without removing covers or reaching near electrical or gas components.
The location of the water offers an important clue. Moisture around a threaded fitting may point to a plumbing connection, while water appearing directly from the tank body or a corroded seam is considerably more serious.
What Causes Leaks From Water Heater Connections?
The hot- and cold-water connections at the top of the heater can develop leaks as fittings age, loosen, or corrode. Water may drip directly from the joint or travel down the outside of the tank, making the leak appear lower than its actual source.
If the surrounding pipework shows substantial corrosion, repeated moisture, or mineral deposits, the connection should be inspected rather than repeatedly wiped dry. Mineral buildup around a fitting often indicates that a slow leak has existed for some time.
Traditional repair of a connection may involve tightening or replacing fittings, but the proper method depends on the material and condition of the plumbing. Excessive tightening can damage threaded components, so more force is not necessarily a better fix.
Why Would the Temperature and Pressure Relief Valve Leak?
The temperature and pressure relief valve, often called the T&P valve, is an important safety component designed to release water if pressure or temperature inside the tank becomes excessive.
Occasional discharge should not simply be stopped by capping, plugging, or disabling the valve. A dripping T&P valve may indicate a faulty valve, excessive system pressure, thermal expansion, or another condition that needs to be diagnosed. Rheem identifies a failing T&P valve as one possible source of water-heater leaks.
Because the valve performs a safety function, the goal is to determine why it is releasing water rather than prevent it from operating.
What Does a Leak From the Tank Itself Mean?
Water escaping through the body or seam of a storage tank usually presents a more serious problem. Steel tanks can corrode internally over time, and once the tank wall has deteriorated enough to leak, patching the exterior does not restore the integrity of the pressure vessel.
Rheem notes that pooling water around the tank body can indicate internal corrosion and that replacement is generally necessary once the tank itself has begun deteriorating.
Signs that deserve closer attention include visible rust, corrosion around the base, recurring water beneath the heater, or moisture that returns shortly after the area is dried. In this situation, traditional repair of individual valves or fittings will not correct the underlying tank failure.
What Should You Do When a Water Heater Is Actively Leaking?
If water is actively escaping, preventing additional water damage takes priority over diagnosing every possible cause. If it can be done safely, shut off the cold-water supply to the heater. For an electric unit, power should be turned off at the appropriate breaker before anyone works around the appliance.
Gas units have different shutoff procedures, so follow the appliance manufacturer’s instructions and avoid manipulating gas components unless you know how to do so safely.
Do not continue operating an electric water heater if water is reaching electrical components. Likewise, if you smell gas near a gas-fired unit, leave the area and follow your gas utility’s emergency instructions rather than attempting a repair.
When Is Traditional Repair Better Than Replacement?
Traditional repair makes the most sense when the tank itself remains in sound condition, and the problem can be traced to a serviceable component. A leaking connection, drain valve, or other replaceable part may justify repair, particularly on a unit that is otherwise performing reliably.
Replacement becomes more practical when the tank body is leaking, corrosion is extensive, or the water heater has developed several significant problems at once. Age also matters, but it should be considered alongside the actual condition of the equipment rather than used as the only deciding factor.
A careful diagnosis prevents two common mistakes: replacing an otherwise serviceable water heater because of a minor connection leak, or repeatedly repairing components on a tank that has already begun to fail.
The best traditional repair is one that addresses the true source of the leak rather than simply stopping the visible drip.
What Is the Best Approach to Troubleshoot and Repair Pilot Light Issues?
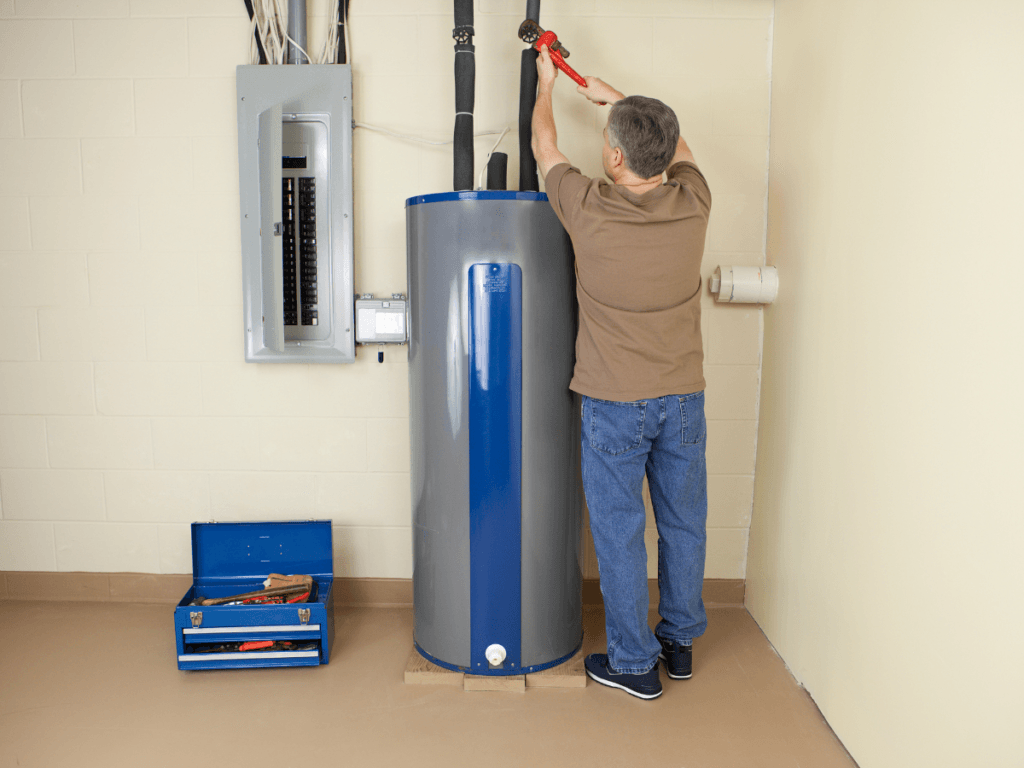
A pilot light that goes out once may be a temporary interruption. A pilot that repeatedly shuts off usually indicates a problem that deserves closer attention. Possible causes range from drafts and airflow restrictions to thermocouple failure, gas-supply problems, or faults within the pilot or control assembly.
Before attempting traditional repair, first confirm that the water heater actually uses a standing pilot. Many newer gas models use electronic ignition or a sealed combustion system, which means the lighting procedure may be different from older units.
The instructions printed on the heater and the manufacturer’s manual should always take priority over generic relighting steps.
How Do You Safely Relight a Water Heater Pilot Light?
If there is any smell of gas around the appliance, do not attempt to relight it. Leave the area and follow the emergency instructions provided by the gas utility.
If there is no gas odor and the manufacturer’s instructions permit homeowner relighting, start by locating the gas control and the lighting directions printed on the unit.
Turn the control to the OFF position and wait the full amount of time specified by the manufacturer before continuing. A.O. Smith, for example, currently instructs users to wait at least 10 minutes so residual gas has time to dissipate.
The next steps depend on the ignition system. Some water heaters have a built-in igniter button, while older models may use a manual pilot-lighting procedure. Do not assume that removing covers and applying a lighter directly to the burner area is appropriate for every model.
After the pilot lights, follow the manufacturer’s directions for holding and releasing the control. Confirm that the pilot remains lit before returning the heater to its normal operating setting.
If the pilot will not ignite after the permitted attempts, stop rather than repeatedly introducing gas into the combustion chamber.
Why Does the Pilot Light Keep Going Out?
A pilot that relights successfully but will not stay on usually points to an underlying problem rather than a one-time interruption.
One common possibility is the thermocouple or thermopile. This safety component detects the pilot flame and allows the gas valve to remain open.
If it cannot sense the flame correctly, the control shuts off the gas supply. Rheem describes the thermocouple as a safety device specifically designed to prevent gas from continuing to flow when the pilot is out.
Other possible causes include:
- A weak, dirty, or partially blocked pilot flame
- Drafts or inadequate combustion airflow
- Changes or restrictions in the gas supply
- A malfunctioning gas control valve
- Problems with the ignition system
- Kinked or obstructed pilot or gas tubing
These causes can produce similar symptoms, which is why replacing parts based solely on the fact that the pilot will not stay lit can lead to unnecessary repairs.
Can You Clean or Adjust the Pilot Assembly Yourself?
Basic visual inspection is reasonable, but disassembling gas components is a different matter.
A dirty pilot assembly can interfere with flame quality, but cleaning burner components, adjusting the pilot, disconnecting gas tubing, or replacing a thermocouple requires working within the fuel and combustion system.
Manufacturer repair instructions for these components commonly warn that improper service can create risks such as gas leaks, fire, explosion, or carbon monoxide exposure.
For that reason, homeowners should not treat these repairs as routine DIY maintenance simply because the individual part may appear inexpensive or accessible.
Traditional repair is more appropriate when the failed component has been identified and the work can be performed safely according to the appliance specifications.
What Does the Pilot Flame Tell You?
On units where the pilot is visible, the flame can sometimes provide useful diagnostic information.
A stable pilot flame should remain consistent enough to keep the flame-sensing device heated. A weak, irregular, or frequently extinguished flame may indicate restricted gas flow, airflow problems, contamination in the pilot assembly, or another control issue.
Do not attempt to enlarge the flame by altering the pilot opening or modifying the gas-control system. If the flame does not match the appearance or behavior described in the owner’s manual, that is a reason for diagnosis rather than adjustment by trial and error.
When Does a Pilot Light Problem Need Professional Repair?
Professional service is warranted when the pilot repeatedly goes out after proper relighting, the heater will not ignite at all, the gas control displays an error condition, or there are signs of combustion or venting problems.
The same applies if you smell gas, see soot, notice scorching around the burner area, or suspect a damaged gas-control component. Those symptoms go beyond ordinary relighting.
A recurring pilot-light problem is usually telling you something about the system. The safest traditional repair approach is to identify whether the fault lies with flame sensing, ignition, airflow, fuel delivery, or the gas control before replacing components.
That avoids treating the symptom while leaving the actual cause unresolved.
When Should Water Heater Thermostats and Heating Elements Be Repaired or Replaced?
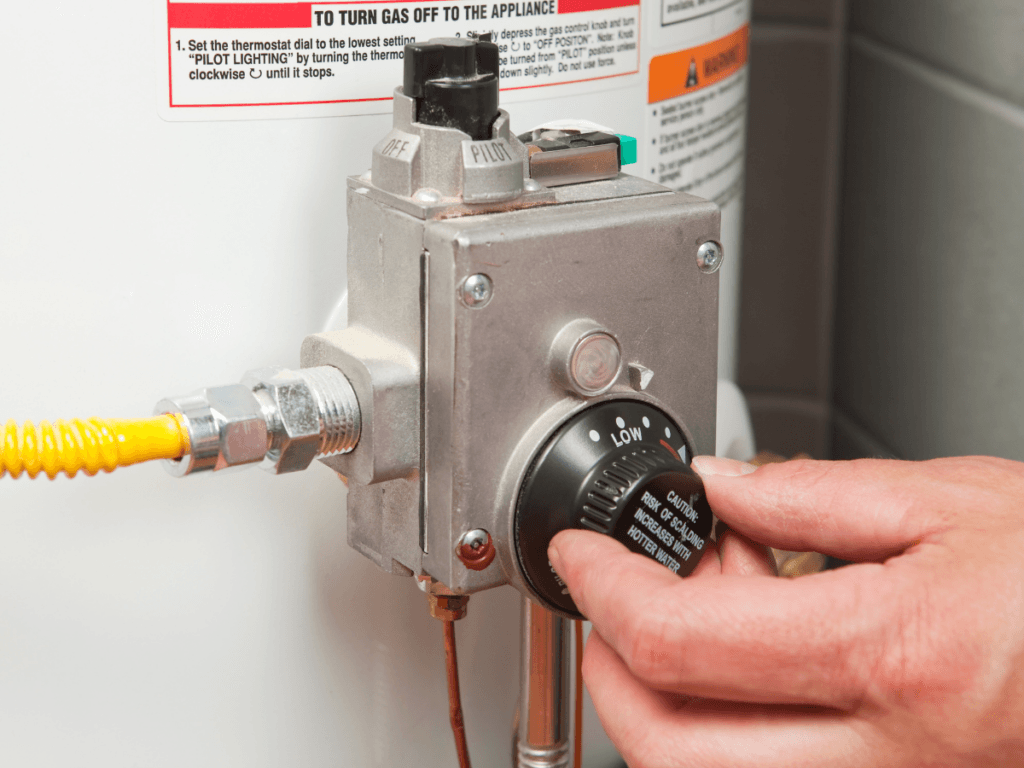
On electric tank water heaters, thermostats and heating elements work together to regulate water temperature and restore hot water after use. When either component begins to fail, homeowners may notice no hot water, shorter supplies of hot water, unusually slow recovery, or temperatures that become inconsistent.
Those symptoms can overlap, which makes diagnosis important. A failed heating element can resemble a thermostat problem, while a tripped high-limit control, wiring issue, or electrical supply problem can produce similar results.
Before choosing a traditional repair, the goal should be to identify the faulty component rather than replacing parts based on symptoms alone.
What Are the Signs of a Faulty Water Heater Thermostat?
The thermostat determines when a heating element receives power. Many standard electric tank water heaters use upper and lower thermostats, with each controlling a different stage of the heating process.
If the upper thermostat fails, the heater may produce little or no hot water. A lower thermostat problem may be more noticeable as reduced hot-water capacity or slow recovery after several showers or other high-demand use.
Temperature problems do not automatically prove that the thermostat has failed. A tripped breaker, high-limit switch, loose electrical connection, or failed heating element can produce similar symptoms.
Understanding how thermostats and electrical controls work together can make it easier to see why a relatively small control component can interrupt an entire heating cycle.
A thermostat that does not shut the element off properly can create the opposite problem and allow the water to become excessively hot. A.O. Smith lists stuck thermostats and grounded heating elements among possible causes of overheating in electric water heaters.
How Are Water Heater Thermostats Tested?
Accurate thermostat testing generally requires electrical measurements rather than visual inspection alone.
Basic homeowner checks can include confirming that the circuit breaker has not tripped and verifying that the temperature setting has not accidentally been changed. Beyond that point, diagnosis often requires a multimeter to check voltage, continuity, or resistance at specific terminals.
Some tests must be performed near energized electrical components. Because electric water heaters commonly use 240-volt circuits, removing access panels and performing live-voltage testing is not appropriate for someone unfamiliar with electrical safety.
A repeatedly tripped high-limit control should also be treated as a symptom rather than simply reset over and over. The cause may involve the thermostat, an element, wiring, or another electrical fault that needs to be identified.
What Symptoms Point to a Failed Heating Element?
Electric water heaters commonly use an upper and lower heating element. Which one fails can affect the symptoms.
A failed upper element may leave the household with no hot water because the initial heating cycle cannot be completed. If the lower element fails, the upper portion of the tank may still heat, but usable hot water can run out more quickly and take longer to recover.
Testing typically involves shutting off electrical power, disconnecting the element, and measuring resistance with a multimeter. The expected resistance depends on the element’s voltage and wattage, so the specifications for the particular water heater should determine whether a reading is normal.
Elements can also fail by becoming electrically grounded. In some cases, a grounded element may continue heating improperly and contribute to excessively hot water.
What Is Involved in Replacing a Heating Element?
Heating-element replacement requires more than unscrewing the damaged component. Electrical power must be shut off and verified before work begins. The tank usually needs to be drained below the level of the element, after which the wiring can be disconnected and the old element removed.
The replacement must match the water heater’s electrical specifications, and the gasket needs to seal correctly when the new element is installed. The tank must then be completely refilled before electrical power is restored. Turning on an element while it is not submerged can cause it to burn out almost immediately.
Because this traditional repair involves both water and a high-voltage electrical circuit, professional service is appropriate when the homeowner is not experienced with electrical testing and appliance repair.
Should a Faulty Thermostat Be Repaired or Replaced?
Water-heater thermostats are generally replaced rather than repaired internally. If proper testing confirms that a thermostat is no longer switching correctly, replacement with a compatible component is usually the practical fix.
Heating elements are treated similarly. A burned-out, damaged, or grounded element is normally replaced rather than rebuilt.
The larger question is whether replacing the component makes sense for the condition of the entire water heater. A relatively minor thermostat or element failure on an otherwise sound tank may justify traditional repair.
The calculation changes if the heater also has tank corrosion, leakage, repeated electrical failures, or several components nearing the end of their service life.
The same basic principles used when comparing equipment repair with replacement apply here: consider the age and overall condition of the equipment, previous repairs, the seriousness of the current failure, and what additional work is likely to be needed soon.
Replacing a thermostat or heating element can restore reliable operation when the tank itself remains in good condition. If several major problems are developing at once, however, continuing to replace individual parts may be less practical than evaluating the water heater as a whole.
How Does Preventative Maintenance Help a Traditional Water Heater Last Longer?
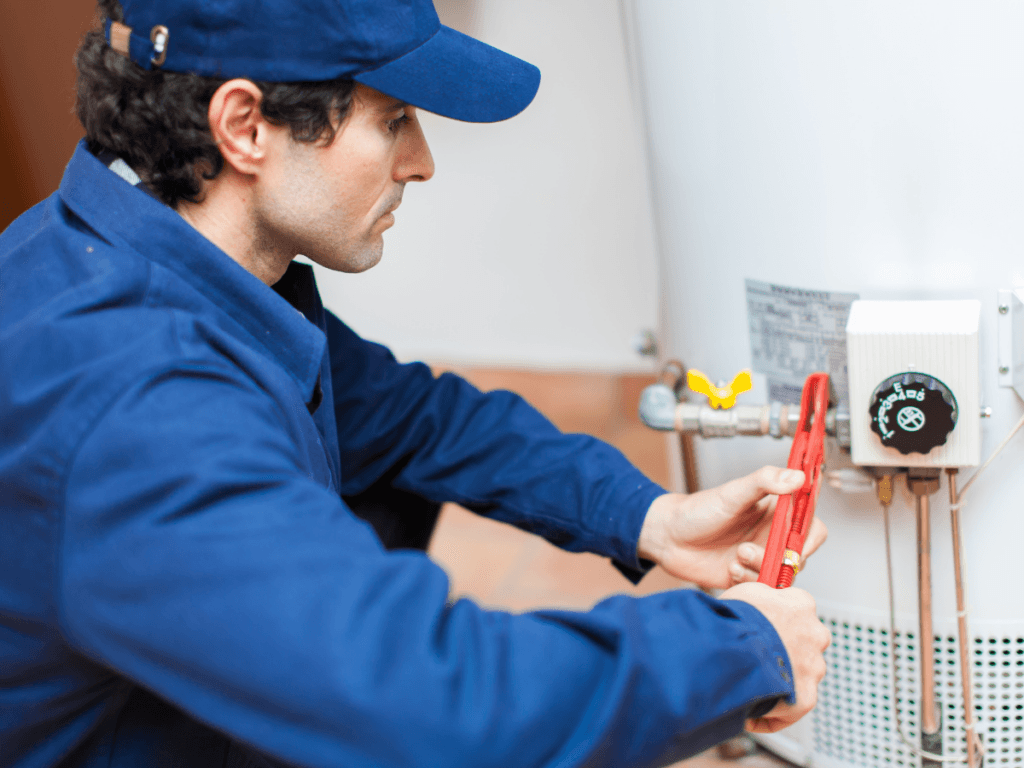
Preventative maintenance helps a traditional tank water heater operate safely, maintain its heating performance, and reveal developing problems before they turn into leaks or equipment failures.
Sediment, corrosion, pressure issues, and worn components can all develop gradually, which means a heater may continue operating even while its condition is declining.
A useful maintenance routine combines simple homeowner observations with periodic service tasks. For traditional repair decisions, this history matters too.
A well-maintained heater with one replaceable failed component may be a stronger repair candidate than a neglected unit showing corrosion, repeated leaks, and several signs of deterioration.
How Often Should a Traditional Water Heater Be Maintained?
There is no single maintenance schedule that applies perfectly to every water heater. Water quality, household hot-water use, equipment age, and manufacturer requirements can all affect how often individual tasks should be performed.
At minimum, homeowners should visually inspect the heater periodically for leaks, corrosion, unusual noises, or changes in performance. More involved tasks such as flushing the tank, checking the anode rod, and inspecting safety components should follow the manufacturer’s instructions for the specific model.
The broader principle is consistency. Preventive service works best when it is scheduled before symptoms appear rather than only after equipment stops working.
That same approach is useful throughout a home’s mechanical systems, where regular annual maintenance can uncover developing wear before it leads to a larger breakdown.
Why Is Flushing the Water Heater Important?
Sediment naturally settles at the bottom of many storage water heaters, particularly in areas with mineral-rich water. As deposits accumulate, they can reduce usable tank capacity and interfere with efficient heat transfer.
A buildup of sediment may also contribute to popping or rumbling sounds as water becomes trapped beneath mineral deposits and heats. Periodic draining and flushing can help remove some of that accumulation.
The appropriate frequency depends on water conditions and manufacturer guidance. Homes with particularly hard water may require more attention than those with lower mineral content. Homeowners who are not comfortable draining a pressurized hot-water system should have the task performed professionally.
What Does the Anode Rod Do?
The anode rod is one of the most important corrosion-control components inside a traditional steel water heater. It is made from a material designed to corrode preferentially, helping protect the steel tank from deterioration.
Because the rod is gradually consumed, it does not last indefinitely. A.O. Smith recommends inspecting the anode rod annually, although actual lifespan depends on factors such as water chemistry, hot-water usage, and whether a water softener is installed.
An anode rod that has deteriorated substantially may need replacement before the tank itself begins corroding. Access can be difficult on some installations, particularly where there is limited clearance above the heater, so inspection and replacement may require professional service.
Why Should the Temperature and Pressure Relief Valve Be Checked?
The temperature and pressure relief valve, or T&P valve, is a safety device designed to release pressure if conditions inside the tank become unsafe.
A malfunctioning valve can create a serious safety concern, but a dripping valve should not automatically be replaced without determining why it is discharging. Excessive water pressure or thermal expansion in a closed plumbing system can also cause the valve to release water.
They recommends checking the valve according to the instructions on its label and having it professionally inspected periodically. Because discharged water can be extremely hot, testing must be performed carefully and only according to the manufacturer’s directions.
The valve should never be capped, plugged, or otherwise prevented from operating.
What Other Maintenance Problems Should Homeowners Watch For?
Routine inspection does not need to be complicated. Changes in the way the heater behaves often provide useful warning signs.
Watch for moisture around plumbing connections, rust or corrosion near the tank, increasingly noisy operation, reduced hot-water capacity, unusually long recovery times, or recurring pilot and ignition problems.
On electric models, repeated breaker trips or high-limit resets should also be investigated rather than treated as normal operation.
How often equipment needs professional attention depends partly on age and usage. Older or heavily used systems tend to benefit from closer monitoring, which is also why service frequency should reflect equipment condition and workload rather than relying on a schedule alone.
Can Maintenance Prevent Every Water Heater Repair?
Maintenance reduces avoidable wear, but it cannot prevent every component from eventually failing. Heating elements can burn out, thermostats can stop switching properly, valves can deteriorate, and tanks eventually reach a point where corrosion becomes significant.
What maintenance can do is improve the odds of catching these problems while they are still manageable.
Discovering a depleted anode rod before the tank corrodes, noticing a small connection leak before it causes water damage, or identifying abnormal pressure before it repeatedly triggers the relief valve can make traditional repair more practical.
It also creates a clearer maintenance history. When a major problem develops, homeowners and technicians can better judge whether one component needs attention or whether the overall condition of the water heater makes replacement the more sensible option.
Which Safety Precautions Are Essential When Repairing a Traditional Water Heater?
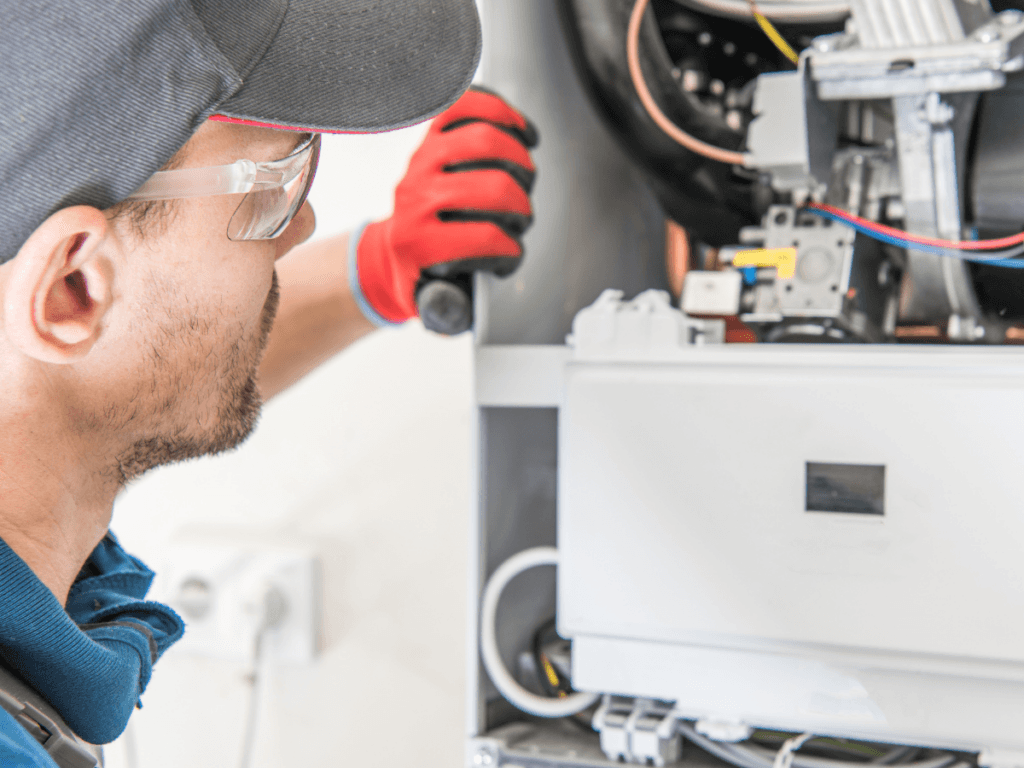
Traditional water heaters combine several hazards in one appliance: hot water under pressure, high-voltage electricity or combustible gas, and surfaces that can become hot enough to cause burns.
That does not mean every problem requires emergency service, but it does mean homeowners should know where basic troubleshooting ends and higher-risk repair work begins.
Before attempting any traditional repair, identify whether the water heater is gas or electric, locate the shutoff controls, and review the manufacturer’s instructions for the specific model. Generic repair steps should never override the safety procedures printed on the appliance or in its owner’s manual.
Shut Down the Correct Energy Source Before Opening the Unit
For an electric water heater, turn off the appropriate breaker before removing access panels or touching wiring. Do not assume the unit is safe simply because the thermostat is turned down. The circuit itself must be de-energized, and anyone performing electrical work should verify that power is off with appropriate test equipment.
Gas water heaters require a different approach. Follow the manufacturer’s procedure for shutting down the burner or gas control. If you smell gas, hear hissing near a gas connection, or suspect a leak, do not continue troubleshooting. Leave the area and contact the gas utility or another appropriate emergency service.
The same basic boundary applies to other home heating equipment: troubleshooting around gas and electrical components requires more caution than checking settings, observing symptoms, or confirming whether an appliance has power.
Once diagnosis requires opening electrical compartments, disconnecting gas fittings, or bypassing safety devices, the work has moved beyond basic homeowner troubleshooting.
Turn Off the Water and Allow the Tank to Cool
If the repair involves draining the tank, replacing a valve, removing a heating element, or opening any water connection, shut off the cold-water supply first.
Remember that the water inside the tank may be hot enough to cause serious burns even after the burner or heating elements have been turned off. Allow the tank to cool before draining it, and route discharge water somewhere it can flow without injuring anyone or damaging the home.
Pressure matters too. A storage water heater is a pressurized vessel, so valves and fittings should not be removed while the tank remains pressurized.
Opening a hot-water faucet after shutting off the supply may help relieve pressure, but the manufacturer’s procedure should determine the proper sequence for the particular unit.
Never Disable a Safety Device to Complete a Repair
Traditional repair should correct a fault without defeating the equipment designed to protect the system.
The temperature and pressure relief valve is one of the clearest examples. If it is dripping or releasing water, do not cap the outlet, plug the discharge pipe, or otherwise prevent it from opening. The valve exists to relieve unsafe temperature or pressure conditions inside the tank.
Likewise, gas controls, flame sensors, thermocouples, high-limit switches, and electrical safety controls should not be bypassed simply to make the heater operate. If the appliance only works when a safety component is defeated, the underlying problem has not been repaired.
Take Carbon Monoxide and Venting Problems Seriously
Gas-fired water heaters produce combustion gases that must be vented safely outdoors. Problems with the burner, flue, draft, or venting system can create a carbon monoxide hazard.
Warning signs can include soot near the burner or vent, unusual discoloration, visible damage to vent connections, repeated pilot outages, or carbon monoxide alarms.
Gas-fired heating equipment generally depends on the same basic combustion safeguards, which is why checking gas connections, ventilation, and carbon monoxide protection is an important part of household heating safety.
Do not attempt to solve a suspected venting or combustion problem by adjusting burners or gas pressure without the appropriate training and instruments.
Keep Water Away From Electrical Components
A leaking electric water heater creates an additional risk because water may reach thermostats, wiring, heating-element terminals, or nearby electrical equipment.
If moisture is entering an electrical compartment, shut off power if that can be done safely and avoid touching wet components. Do not restore power simply to see whether the heater still works.
Similarly, after replacing an electric heating element, the tank must be completely filled before power is restored. Energizing an element without water surrounding it can cause rapid failure.
Know Which Repairs Are Reasonable for a Homeowner
Basic checks such as looking for visible leaks, confirming breaker status, reviewing thermostat settings, checking for obvious corrosion, or following the manufacturer’s approved pilot-light procedure may be reasonable for many homeowners.
A different level of risk begins when traditional repair requires:
- Live-voltage testing
- Replacement of electrical controls
- Removal of gas valves or gas tubing
- Burner or combustion adjustments
- Venting modifications
- Work on a leaking or badly corroded tank
- Diagnosis of repeated safety-control shutdowns
Those jobs require more than ordinary hand tools. They depend on understanding electrical, gas, combustion, pressure, and appliance-safety requirements.
The safest repair is not necessarily the one a homeowner can physically complete. It is the one that corrects the problem without introducing a greater hazard.
If the diagnosis or repair requires bypassing a safety control, working on live electrical components, disturbing the gas system, or guessing about combustion performance, professional service is the appropriate next step.
Conclusion
Traditional water heaters can develop problems ranging from inconsistent temperatures and unusual noises to leaks, sediment buildup, and a complete loss of hot water.
While basic troubleshooting can help homeowners identify simple issues, persistent or potentially hazardous problems should be evaluated by a qualified professional who can determine whether repair or replacement is the better option.
Timely service can help restore reliable hot water while protecting the system from further damage.
For professional water heater repair, troubleshooting, and replacement services, choose Ace Tech Heating & Cooling. If your water heater is no longer performing as it should, call (404) 369-9100 to speak with the team at Ace Tech Heating & Cooling or fill out the site form to get your free quote today.